Contacts are the people on the client’s side: who gets the delivery email, who may approve, and who shows up by name on comments in the portal. Add them before your first delivery, so nothing goes to a stranger’s inbox.
Add a contact
- In the app header, open the client dropdown and click Manage, then the client’s name.
- Open the People tab.
- Click Add Contact.
- Fill in Email. It is the only required field. Add Name and Phone if you have them.
- Pick a Role: Manager (approves, downloads) or Reviewer (comments, requests changes).
- Tick Primary contact (receives emails by default) for whoever answers for the client.
- Click Add. The contact appears in the list right away.
Make roles actually restrict things
By default roles are labels — every registered contact can approve and download. Turn the restriction on when a client has people who should comment but not sign off.
- Open the avatar menu in the top-right corner and click Workspace Settings.
- Go to Client portal.
- Under Approval, turn on Use contact roles (gestor/revisor).
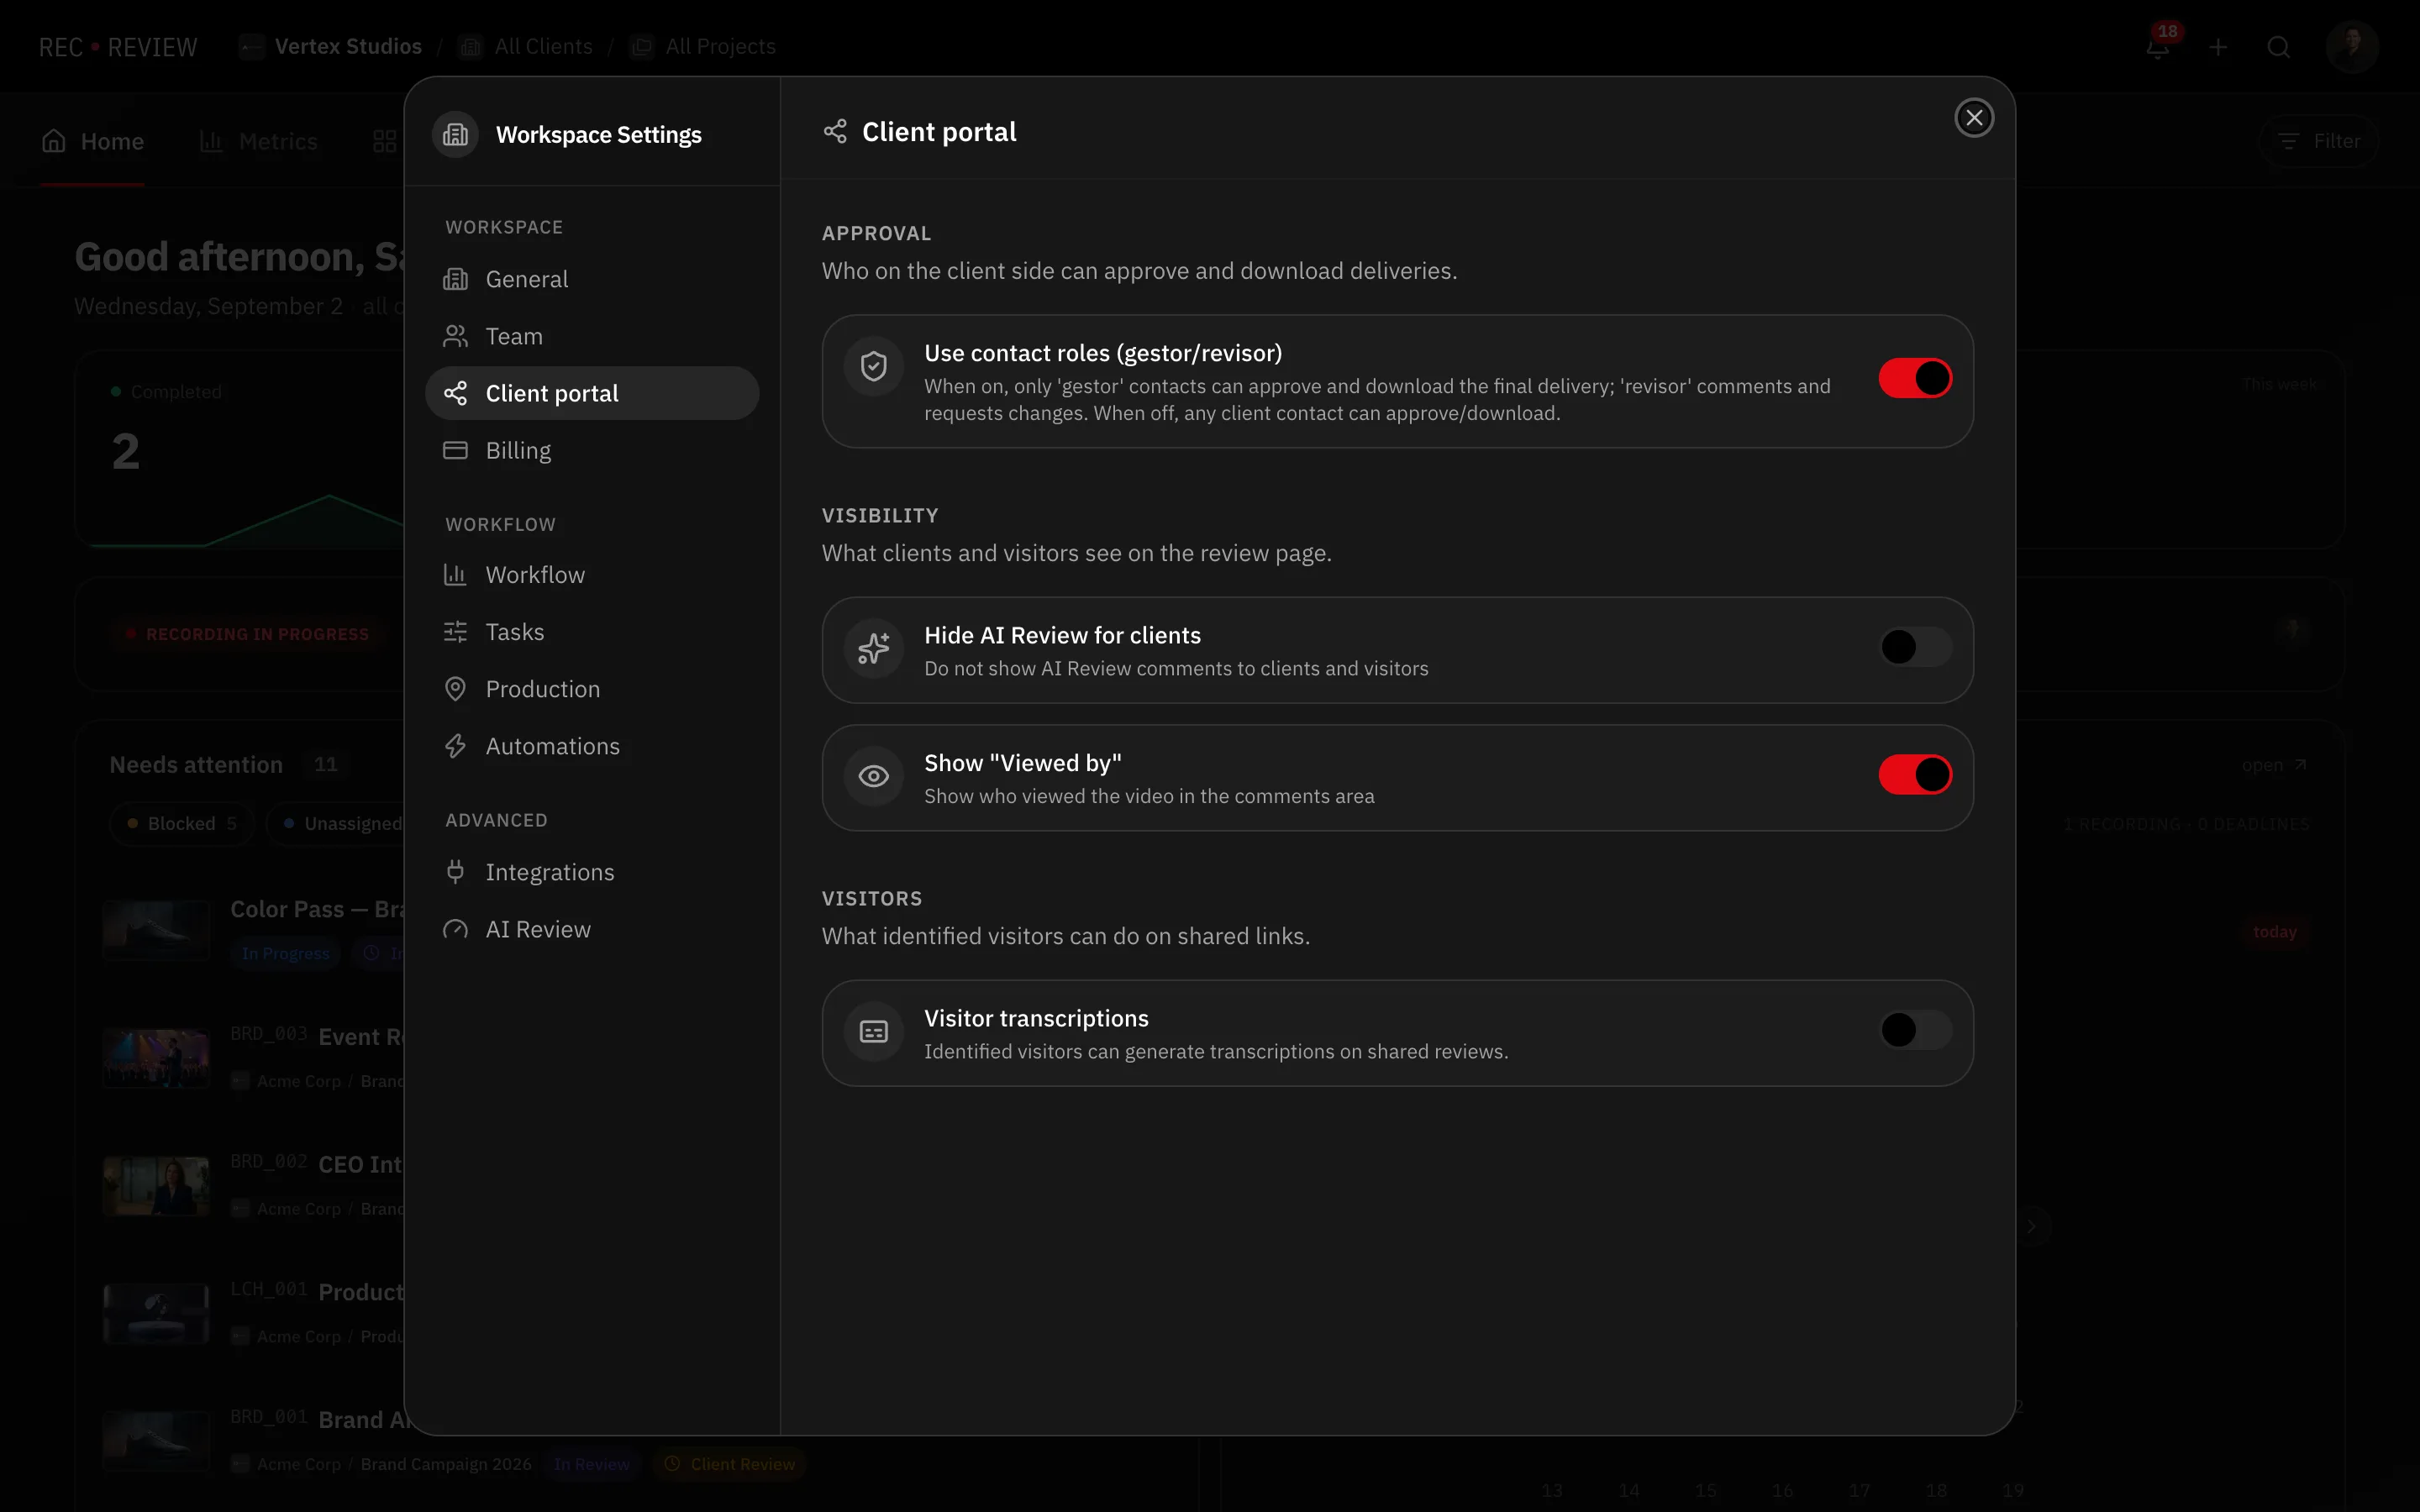
With it on, only Manager contacts approve and download the final delivery. Reviewer contacts comment and request changes. Commenting, replying and requesting changes stay open to both roles either way.
Verified contacts
A contact becomes Verified the first time they prove the email — by entering the code sent to them, or by signing in with Google or Microsoft. Verification is what connects portal activity to that person, and what unlocks their profile and notification preferences.
The People tab shows, per contact: Materials viewed, Portal visits, Comments, Approvals, Status and Last seen. Click a row to open that contact’s activity history.
Language per contact
Each contact picks the portal language in their own profile, under My profile → Language. Emails follow that choice, so a Brazilian producer and an American client on the same project each read their own language.
What’s next
Learn how your client signs in and which emails they receive.