Every plan includes unlimited users — teammates, freelancers and clients cost nothing extra.
Before you begin: only owners and admins can invite people.
Send an invite
- Click your avatar, top right, and choose Workspace Settings.
- Open the Team tab.
- Under Invite member, type the email address.
- Pick a role in the dropdown next to it. The default is Editor.
- Click Invite.
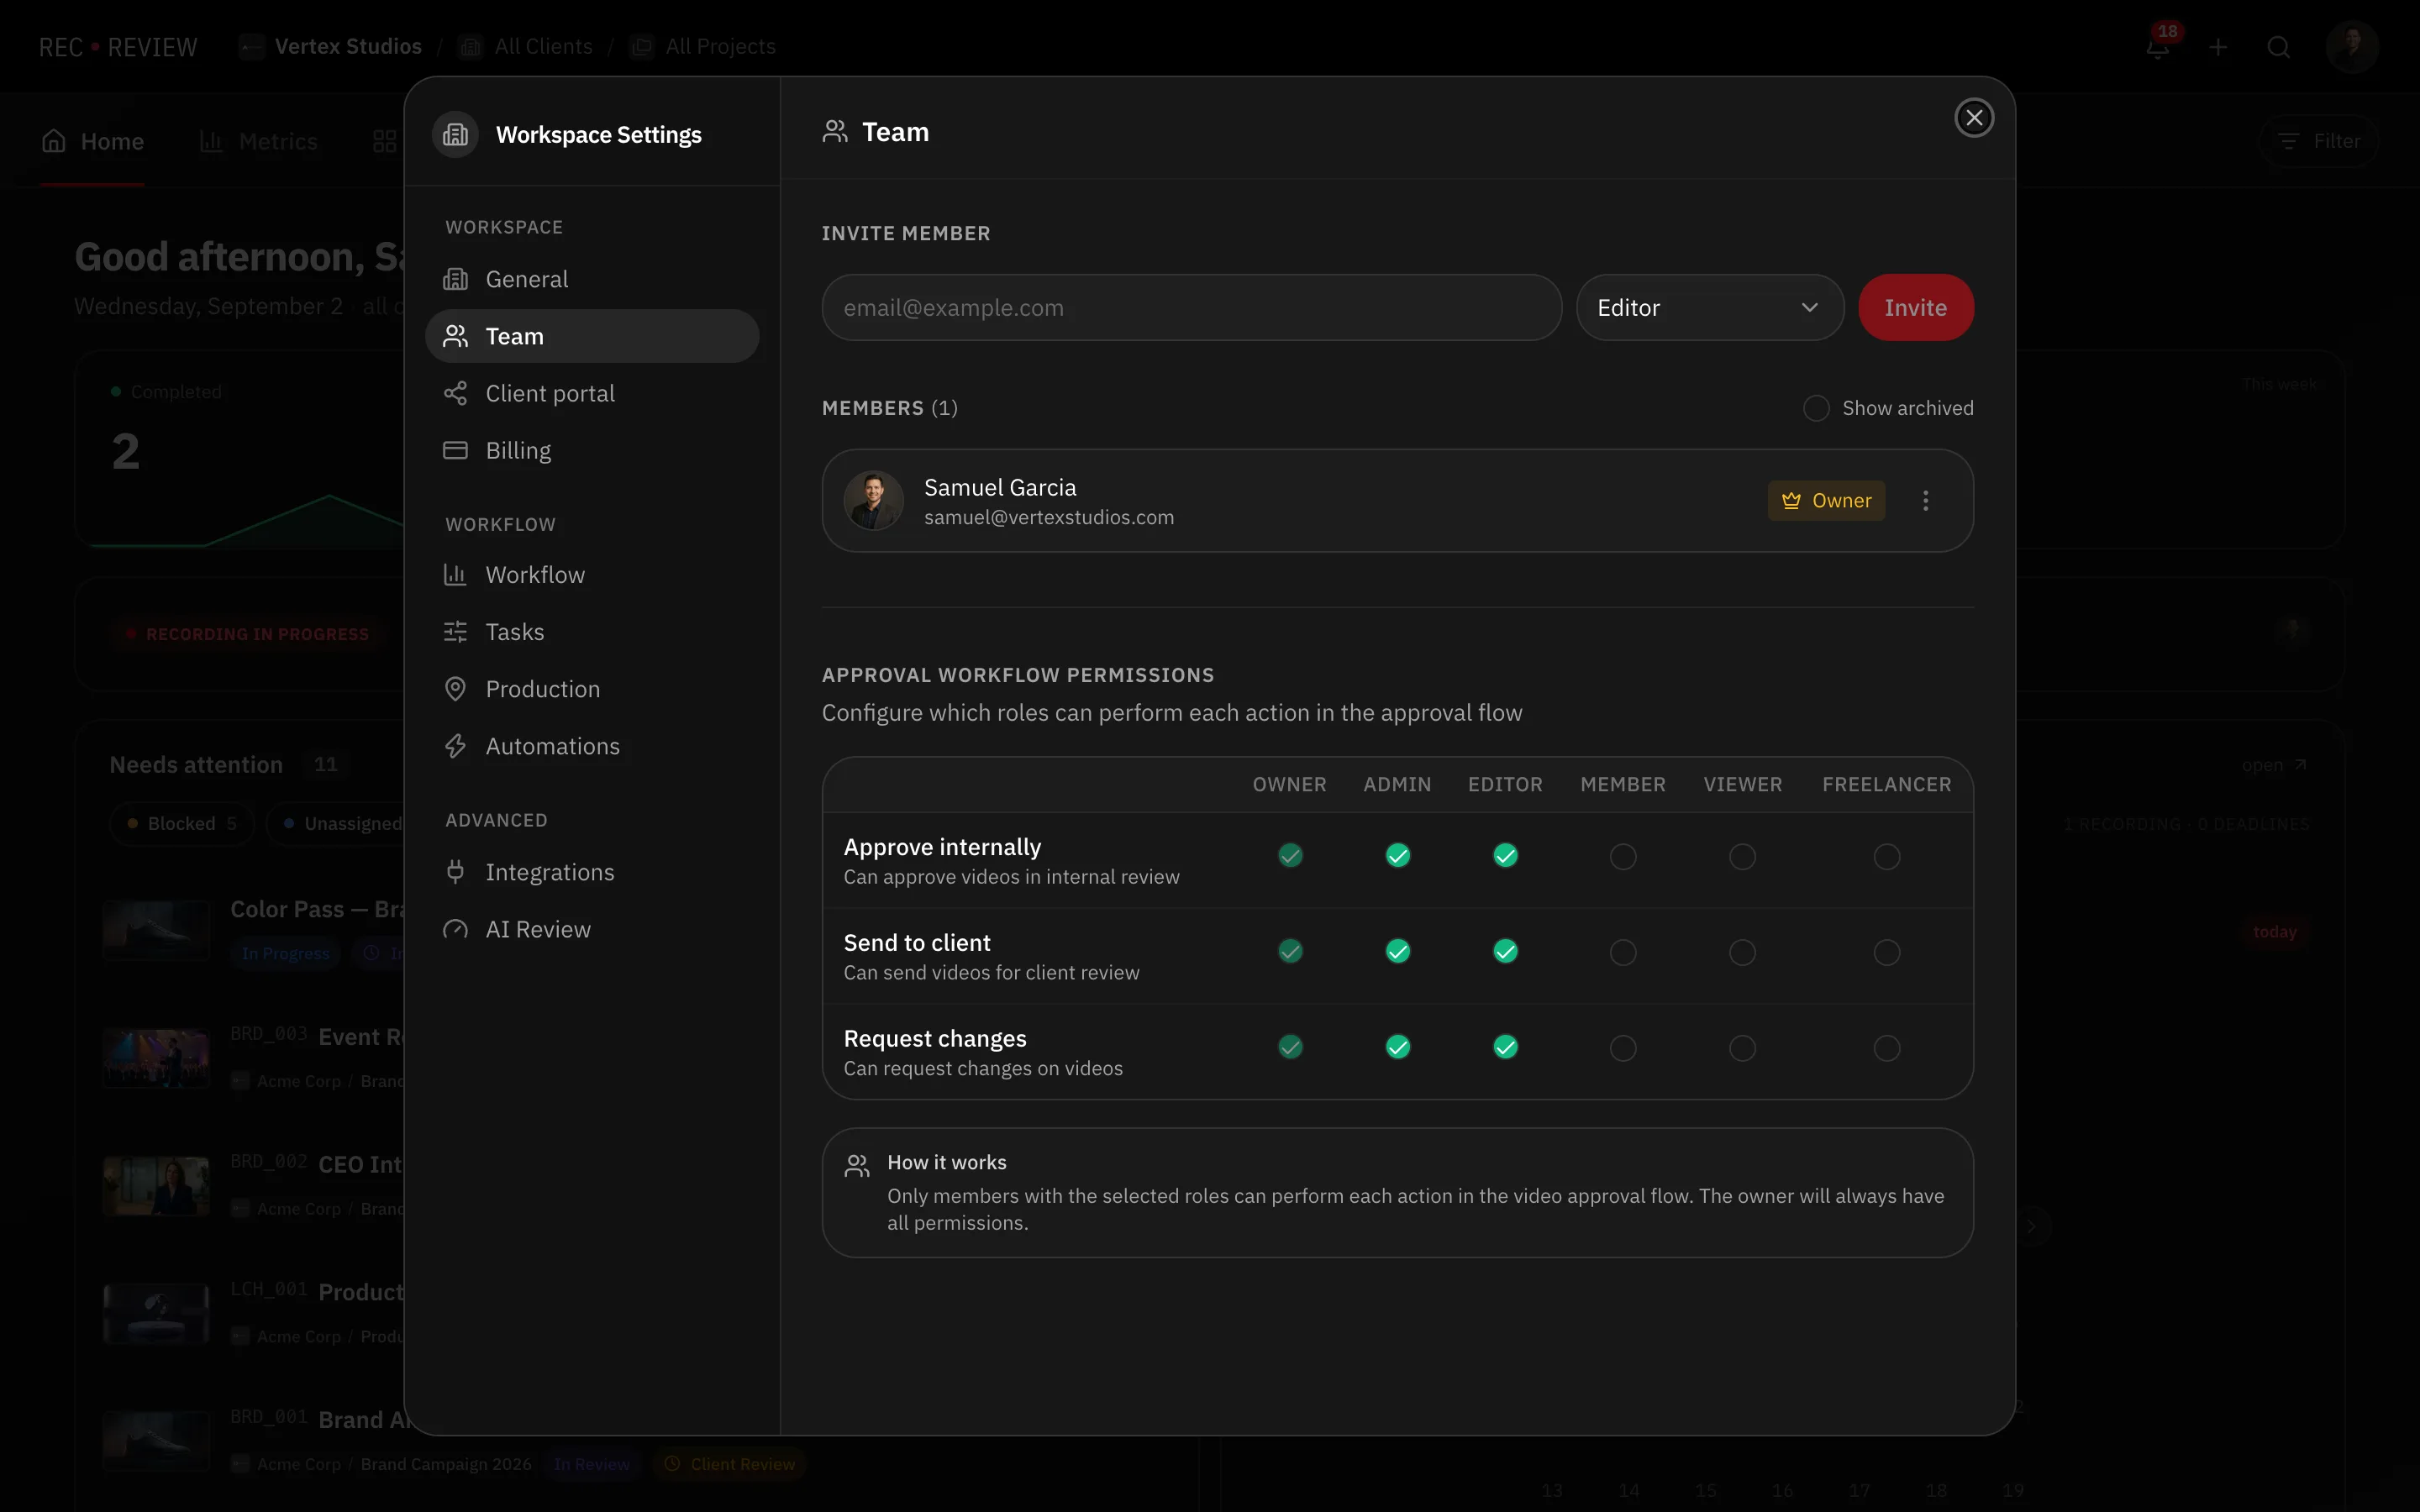
The person gets an email with an invite link. If they do not have a RecReview account yet, they create one and land straight in your workspace. An invite that sits unused eventually stops working — Resend issues a fresh one.
Share a link instead
In the Pending invites list, use Copy link to get the same invite as a URL you can paste into Slack or WhatsApp. The other two buttons there are Resend and Cancel.
Which role to pick
| Role | In one line |
|---|---|
| Admin | Manages team, settings and all tasks |
| Editor | Creates and edits tasks, videos and comments |
| Member | Works on assigned tasks, cannot create new ones |
| Viewer | View-only access to tasks and videos |
| Freelancer | Limited access to specific assigned projects |
Full detail is in team roles and permissions.
Limit someone to certain projects
Freelancers and members can be scoped to projects. In the members list, open the member’s menu and choose Project Access, then select the projects they can see. They will only view and work on tasks inside those projects.
When someone leaves
Two options in the member’s row:
- Suspend blocks access immediately and is reversible with Reactivate.
- Archive (Offboarding) is permanent. Before it runs, RecReview lists their open tasks, subtasks, assigned comments, running timers and the automations that assign work to them, so you can reassign each one. Finished work stays credited to them.
Note: Clients do not need an invite or an account. They review through a share link or the client portal — see client portal overview.