Your workspace name and logo appear in the app header and on every screen your clients see. Do this before you invite anyone or send a portal link.
Before you start: only owners and admins can change them.
Rename the workspace
- Click your avatar at the top right and choose Workspace Settings.
- Open the General tab.
- Check that Current workspace is the one you mean. The selector switches between the workspaces you belong to.
- Edit the Name field and press Save.
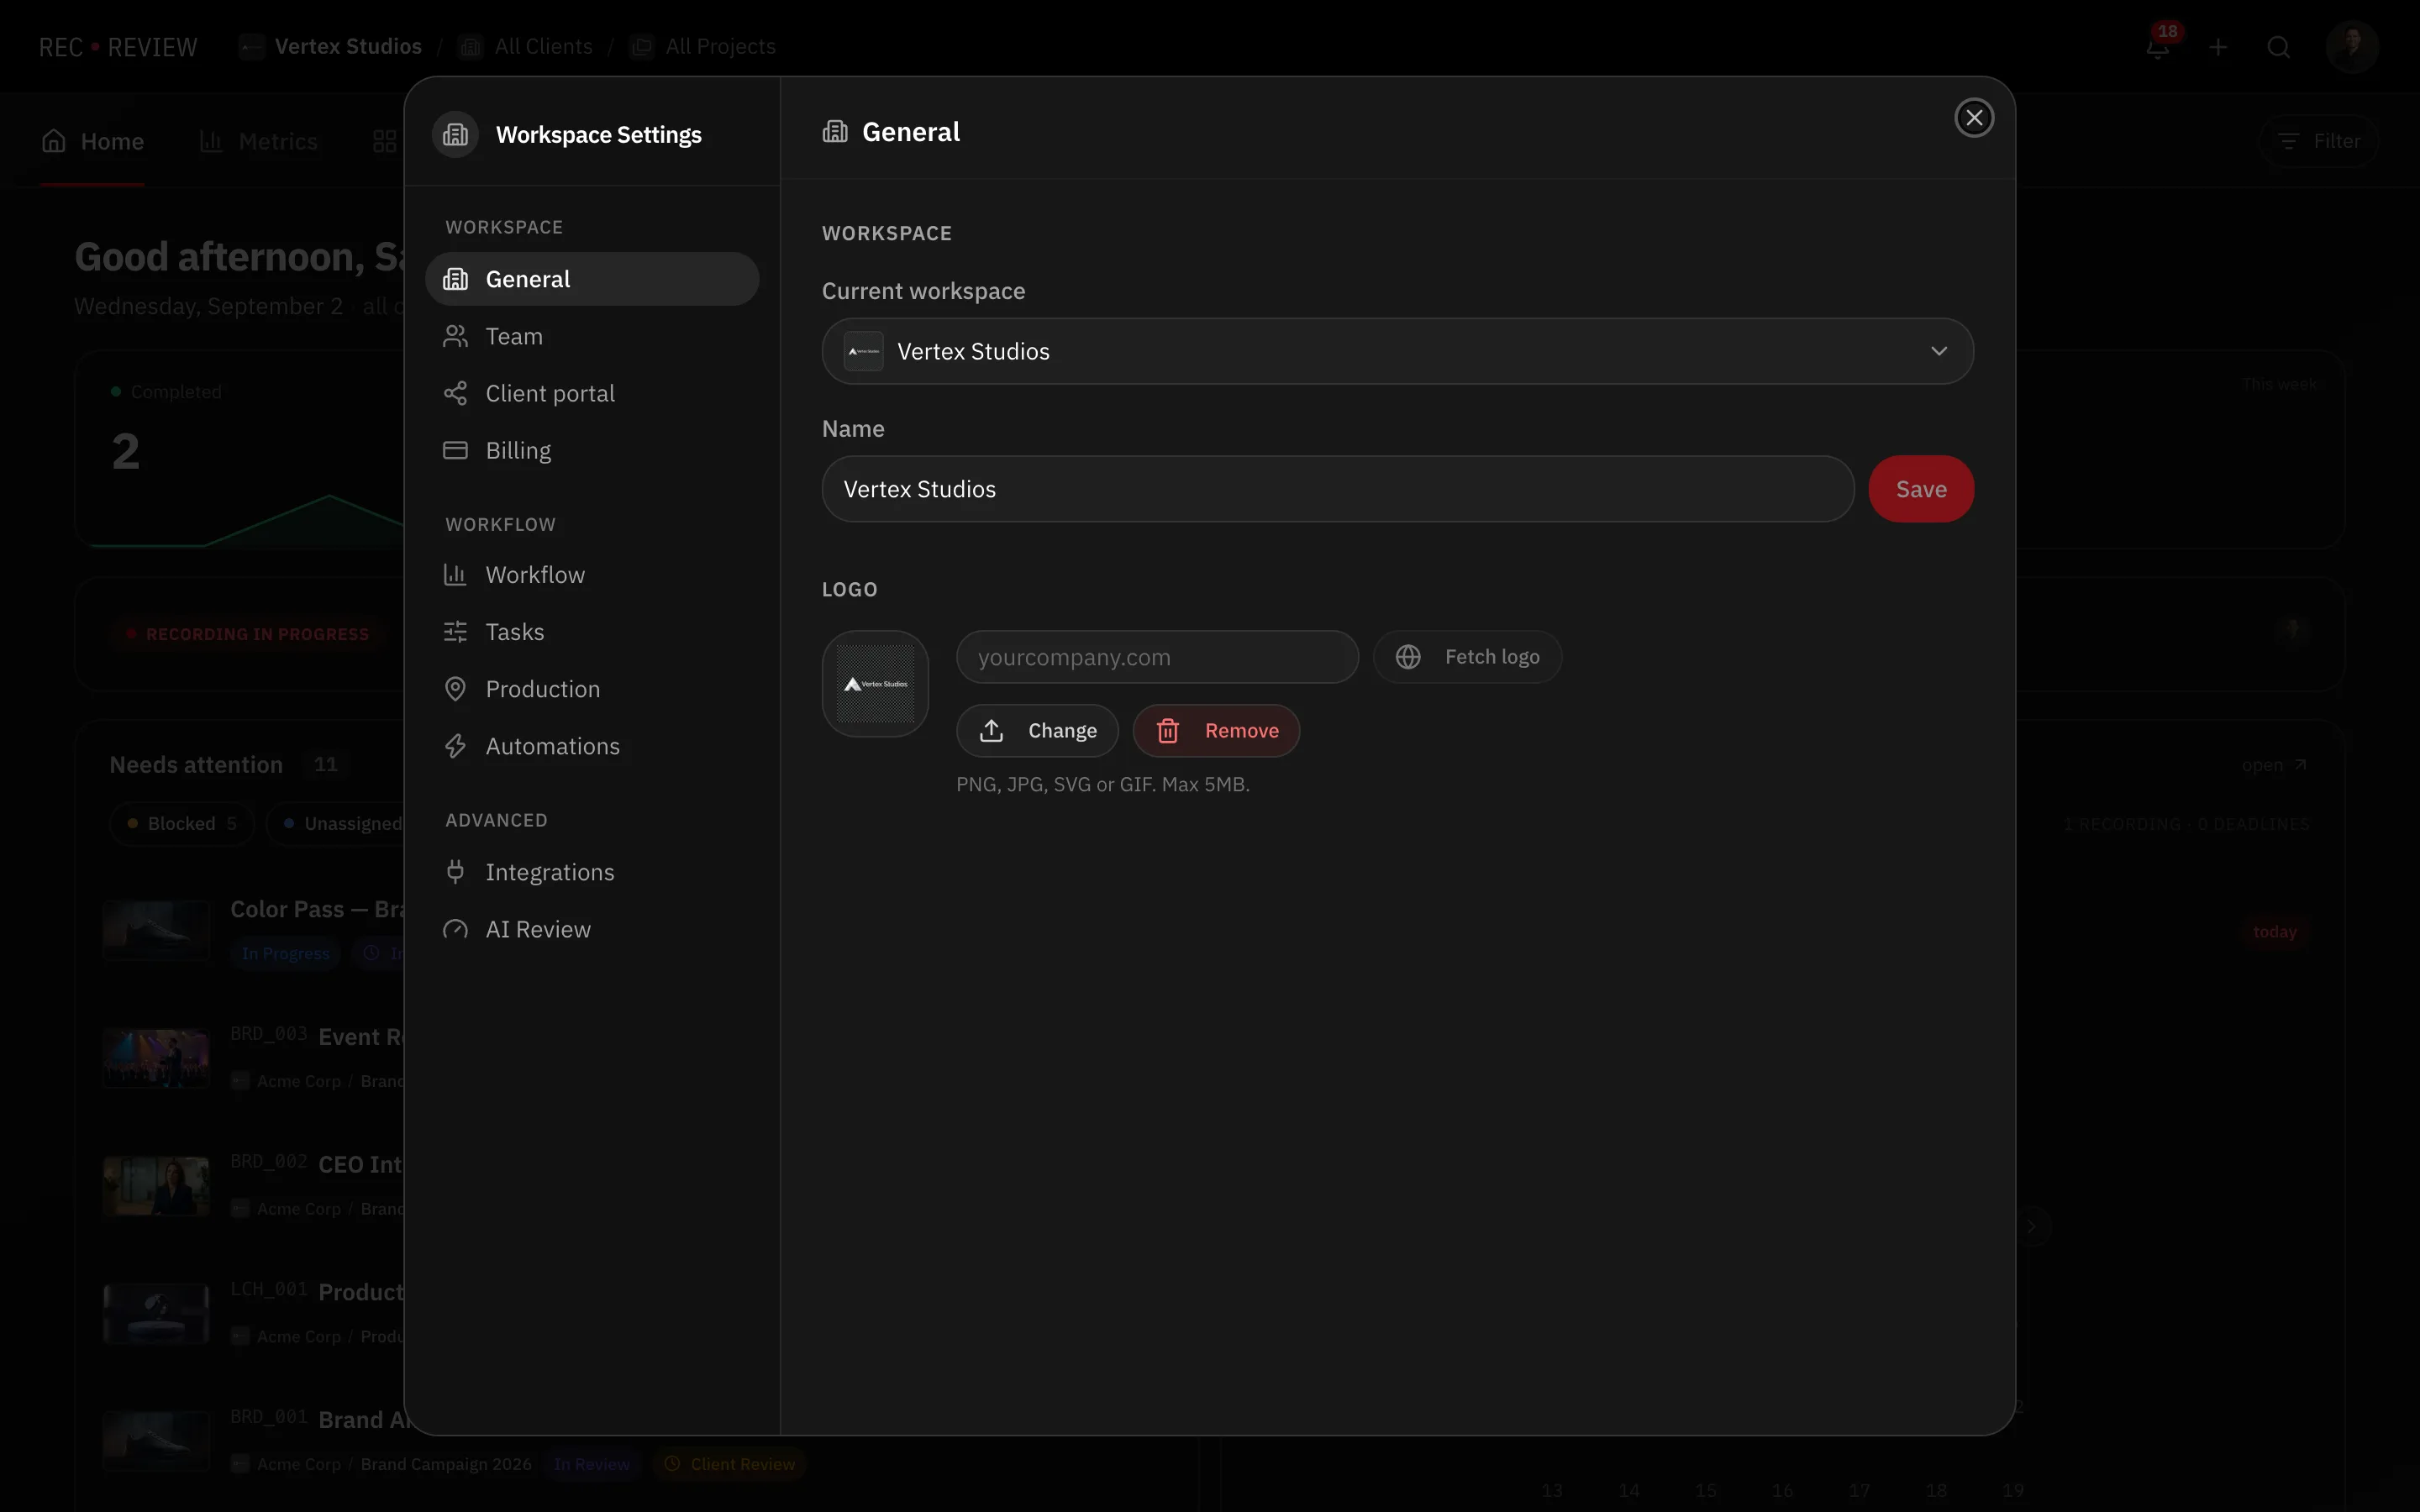
Set the logo
Under Logo you have two ways in:
- Press Change (or Upload, if there is no logo yet) and pick a file. PNG, JPG, SVG or GIF, up to 5 MB.
- Type your domain —
yourcompany.com— and press Fetch logo to pull it from the web.
Remove clears the logo and goes back to the initials.
Tip: Fetching by domain is the fastest route, but it takes whatever is published on the site. If the result is a low-resolution favicon, upload the real file instead.
Where it shows up
The logo sits next to the workspace name in the app header and the workspace switcher, and it brands the client portal. See client portal overview.
The name travels further than the interface. It is what an invited teammate reads in the invitation email, and what identifies the workspace in notifications.
The change is immediate
There is no publish step. Saving updates the header for everyone on their next load, and the portal the next time a client opens it.
Nothing else moves: clients, projects, videos, comments and links keep working, because none of them depends on the name.
Adding another workspace
Workspaces are billed separately, each with its own plan, storage and AI minutes. The selector at the top of the General tab is where you move between the ones you belong to.