Turn a finished review into timeline markers and open them in your editing software, so you cut against the notes instead of a second screen.
Before you begin: sign in as a member of the workspace. The export menu appears once the video is ready to watch.
Steps
- Open the review page.
- Click the download icon above the comment list. A short menu opens.
- Choose the format:
- Premiere (XML) — a sequence XML.
- DaVinci Resolve (XML) — an FCPXML timeline.
- Full Report (PDF) — the human-readable version, for people who aren’t in the edit.
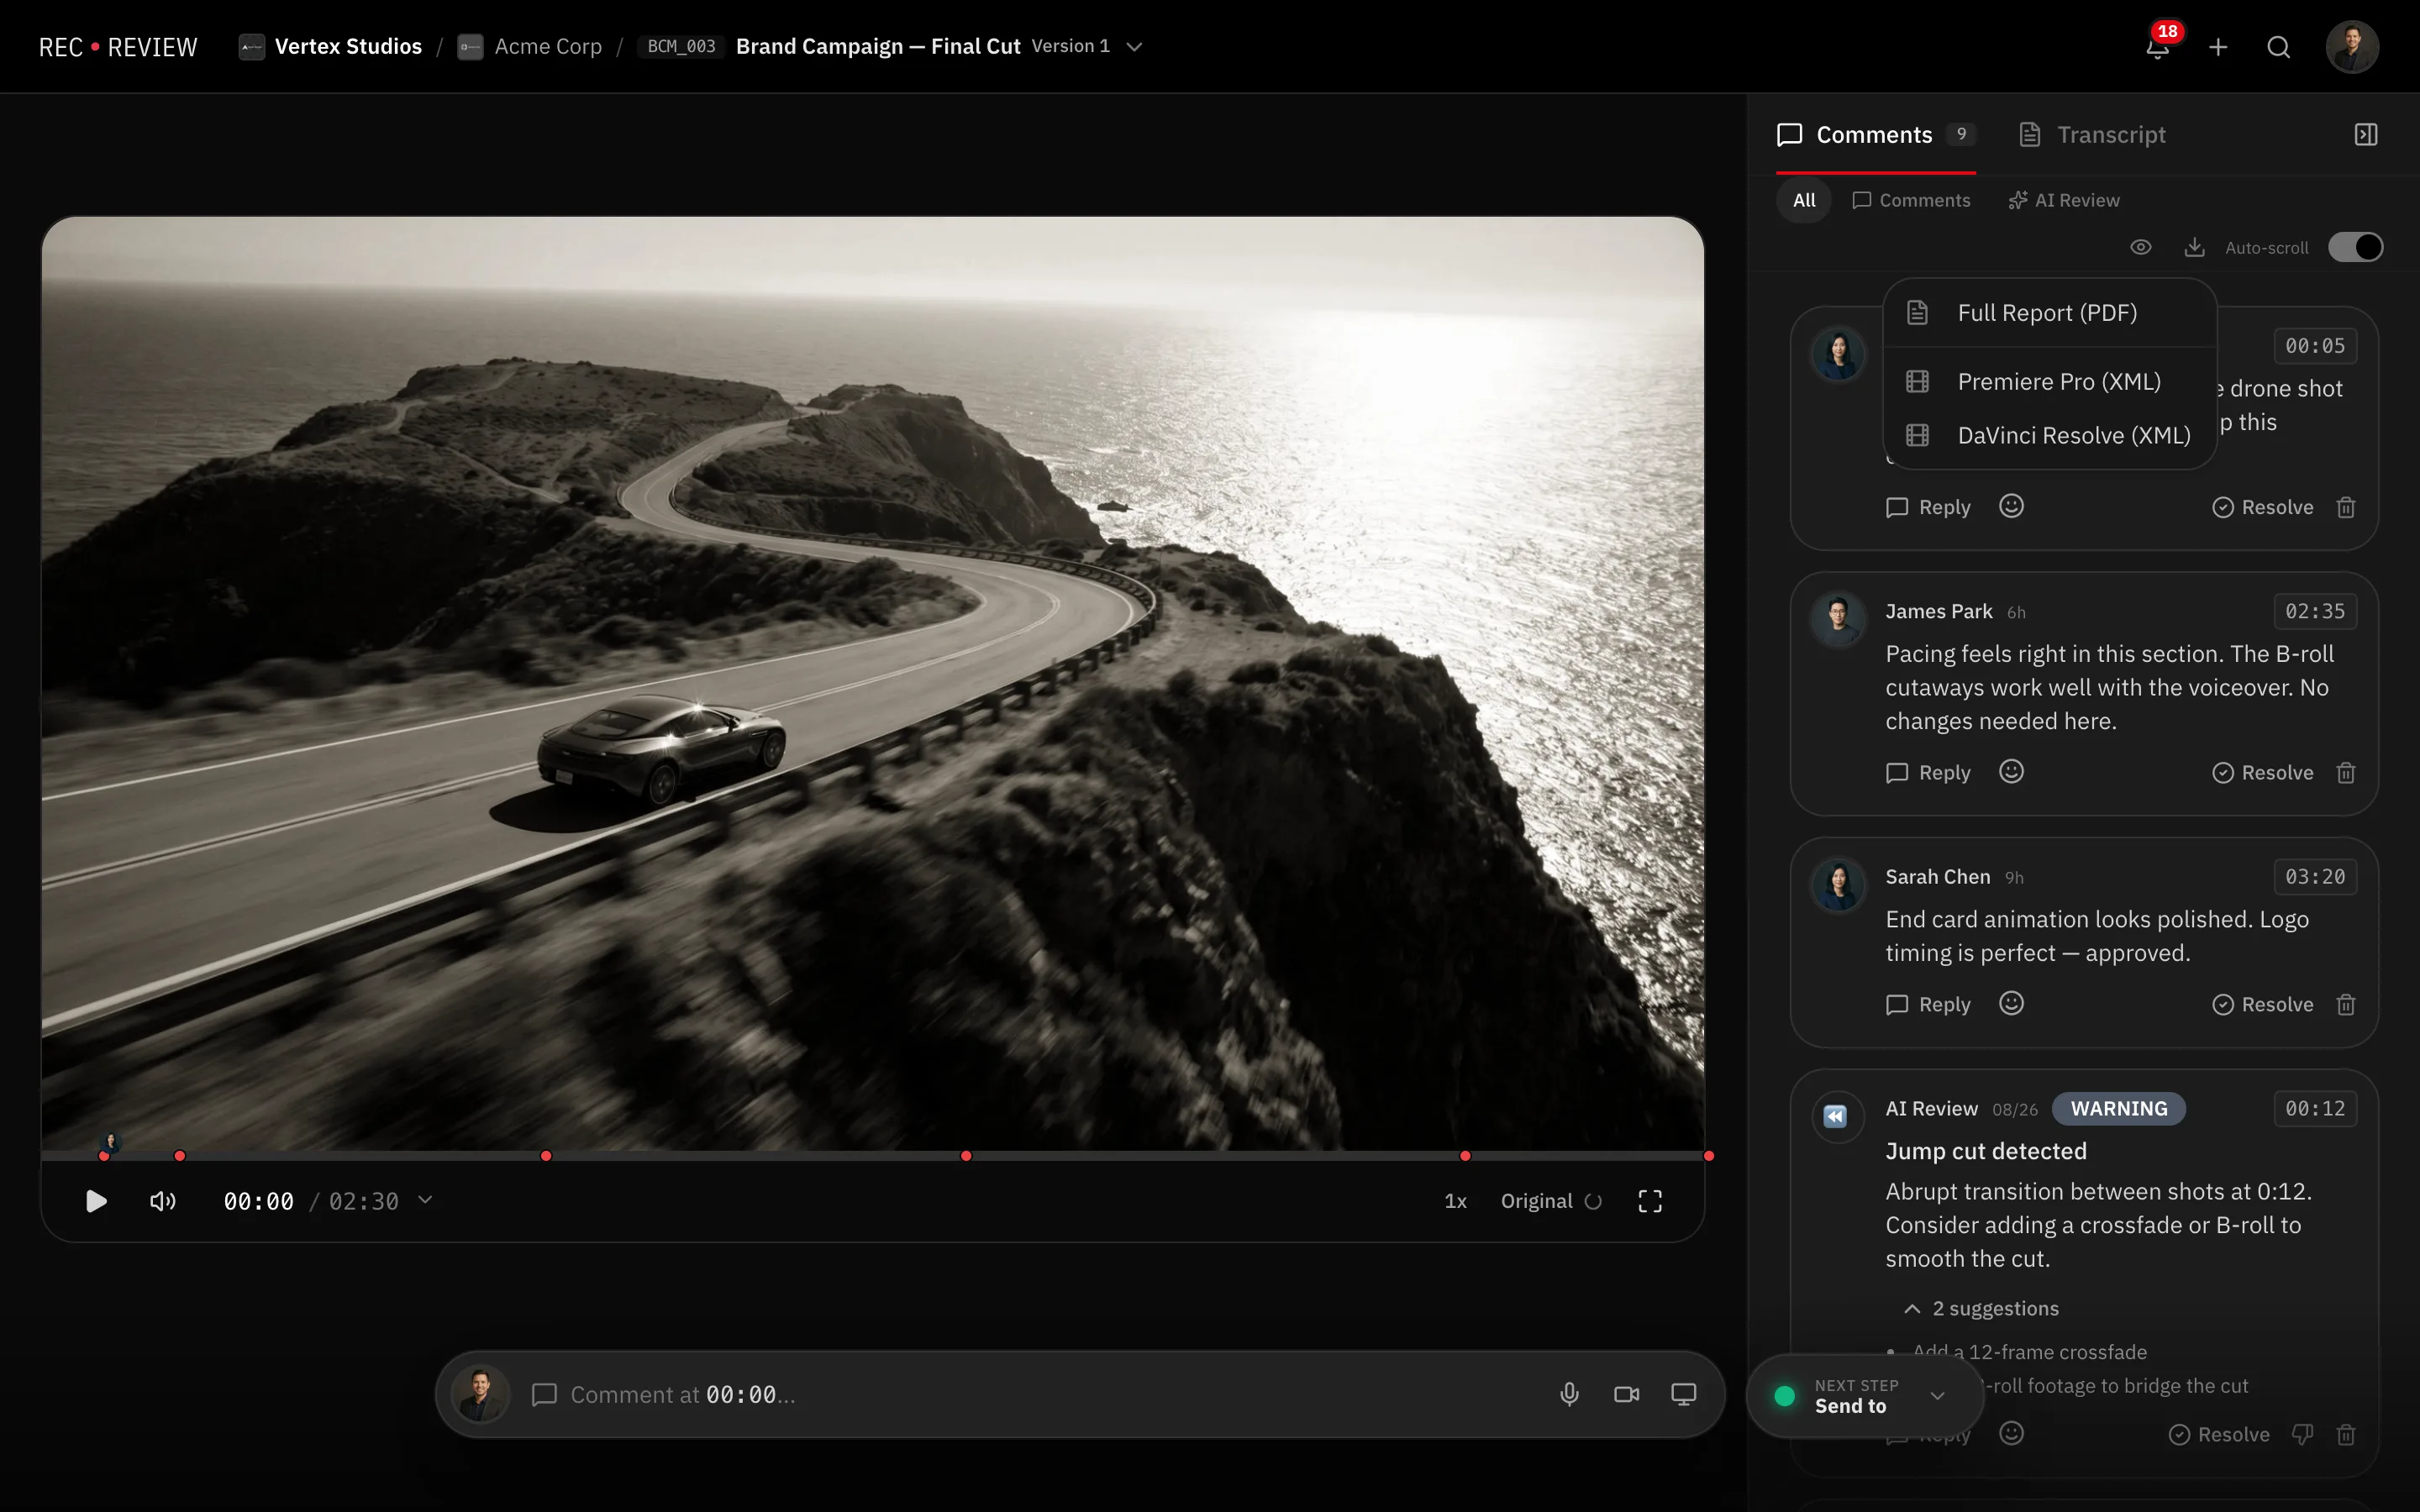
The file lands in your downloads, named after the video, the format and the date.
Importing into your editing software
- In Premiere, choose File → Import and pick the XML. The imported sequence carries the markers.
- In DaVinci Resolve, use File → Import → Timeline and pick the XML.
- Copy the markers onto the sequence you are actually cutting, or use the imported timeline as a reference track.
Each marker is named with its source: [Comment] for a note somebody wrote, [AI] for a finding from the AI review. The comment text goes into the marker’s note. In the DaVinci export, high-severity findings come in as chapter markers, so they stand out in the timeline navigator.
Note: Markers are placed against the frame rate recorded for the file. If you conform the cut to a different rate, they land on the same timecode, not the same frame number.
What comes across
- Comments visible to whoever runs the export, with their author.
- AI findings, unless the workspace hides the AI review from clients and the exporter is not a member.
- Nothing else: drawings, attachments and recordings stay in RecReview.
What’s next
Once the notes are in your timeline, the fixed cut goes back up as a new version — see Versions and comparison.